

With the Server app, you can host websites that you’ve created with web tools outside of Lion Server and copied onto the server Mac. You can replace Lion Server’s built-in site with your own, or you can add one or more sites.
Replacing the default wiki-based website is easy. Just use the same host domain name as the default and be sure to assign your Mac’s IP address to the new site. You don’t have to change any DNS settings.
If you want to run both the default site and your own, be sure to use a different domain name for the new site. Your DNS server will need to be configured to have the domain name resolve to the server IP address. With either option, the files for the default site stay in place and are not deleted.
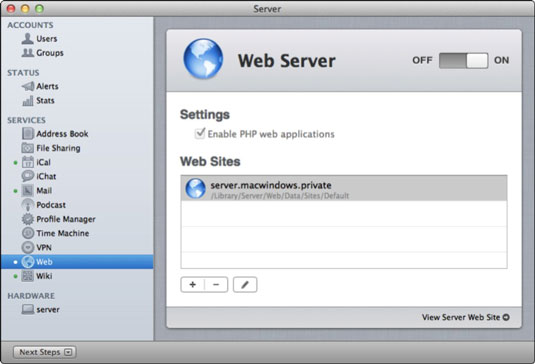
- Launch the Server app and select web from the sidebar.Make sure that web service is turned on in Lion Server. To turn on web service, open the Server app and click web in the sidebar. Turn web services on and off with the big switch.
- Click the Add (+) button to bring up a dialog for a new website.
- To specify a custom location to store your website files, choose a folder where your website files will be from the Store Site Files In pop-up menu.If you accept the setting Default Location, Server Preferences creates a folder for you in this location: /Library/Server/web/Data/Sites/CustomSitesDefault. It’s safer to store web data on a hard drive or storage device other than the boot drive.The folder you designate will need to include a site home page — an index.html or index.phpfile. To view the folder contents, click the View Document Root Contents link in the dialog.
- In the Domain Name field, type the site’s fully qualified DNS name.The fully qualified DNS name is a unique identifier for the website. For example, two different fully qualified DNS names might be homework.abc.edu and teachers.abc.edu. You might use these two names to host both the built-in default site and your new site.

- From the IP Address pop-up menu, choose an IP address that people will use to access the website or choose the Any setting.If you choose Any and your site has the same domain name as the default site, only the default site will be served.
- (Optional) In the Port field, change the Port number.The default port setting is 80. If you’re using SSL, port 443 is a good number. You can have multiple websites using the same port if you want, or you can choose a port number that isn’t being used by another service. You may be able to use port 8080, which is another port that the server uses as a default. Port numbers 81–87 are generally safe to use for websites.
- (Optional) In the Who Can Access pop-up menu, select a group account to allow only those members to visit the site or select Customize to restrict access to subfolders of the website.
- Click the Done button.